This workout section is designed to be referenced by both participants and coaches. Ideally, coaches will be participants as well. The unofficial motto of my medical school training was "See one, do one, teach one" -- and there is no better way to teach lifting techniques than from the perspective of doing them. Not to mention the fact that these movement patterns are extremely valuable for adults as well! Seriously, try it yourself first, be patient as you identify holes in your own mobility that need to be addressed, and you will find yourself much better equipped to train and encourage others.
Why lift weights? Short answer: injury prevention. Female athletes suffer life-altering ACL injuries anywhere from 3-4 times more frequently than their male counterparts, depending on the sport. The majority of these injuries occur from non-contact mechanisms, such as cutting, pivoting and landing from a jump.
Why are female athletes more vulnerable to knee injuries? A variety of mechanisms have been proposed, including basic anatomic differences, hormonal changes, and movement patterns. Considering that the first two differences are not modifiable, it's most profitable to focus on the third.
Is it possible to learn how to move more safely as an elite volleyball athlete? Good news – yes, it is. A recent meta-analysis reviewed five studies that demonstrated significant reductions in ACL injuries as a result of neuromuscular training programs emphasizing balance, flexibility, and core strength. This review estimated that training 89 athletes would prevent one ACL injury over the course of a competitive season.
While ACL injuries are a useful benchmark for study, it's important to emphasize that strength training is about building total body fitness and symmetric strength. Our goal with this curriculum is to introduce you to a system of movement and training that will be an asset to you for the rest of your life – with the goal of constantly striving to increase your level of fitness and mobility.
To understand why core and full-body strength are critical for joint injury prevention, it's important to understand the origin of injury: dysfunctional positioning or movement patterns. While your body is capable of generating and transmitting tremendous amounts of force, it is critical to transmit force in the way your bones, joints, and soft tissues were designed to apply it.
While ideal posture, positioning, and movement patterns can be taught and understood in the context of your routine volleyball training, most injuries occur in competition when both intensity and fatigue are high. It's at those critical moments – when you're giving everything to win the point – that a reservoir of strength and practiced repetition of safe movement patterns can make a difference.
How can stronger muscles and practicing safe movement patterns keep your joints and ligaments safe? The best explanation can be found in observing the structure of your ligaments themselves. Ligaments are not just passive cables connecting two bones across a joint – in addition to being freakishly strong, they also contain within them stretch receptors known as proprioceptors that measure the force being experienced by the ligament, and transmit that information through the nervous system so that it feeds back to the surrounding muscles. In other words, the job of moving and stabilizing a joint depends on ligaments and surrounding muscles working together as a team – and if the ligament cannot depend on the muscles to kick in when needed, the entire joint is at risk.
Enough theory, it's time to get started. Here are three things to consider:
Gym: Ideally you will have access to a squat rack or power rack, a standard Olympic barbell, a variety of plates (ideally including bumper plates), and smaller barbells down to 20 pounds for beginners. For younger athletes (< 13 years old) being first trained solely on technique, weighted bars can substitute for even a small barbell.
Shoes: Flat-bottomed shoes with minimal padding are essential. Note that volleyball or running shoes are not ideal for weight lifting. Popular options include Chuck Taylor-style canvas sneakers, as well as a variety of zero-rise/low-profile shoes offered by Merrell, New Balance, and other manufacturers. The two critical ingredients are a flat profile (no elevation of the heel), and minimal padding to disrupt force transfer or interfere with balance as you lift.
Gloves: Not necessary, but preferred by some. Gloves can prevent callus formation when doing upper body "pulling" exercises, but are generally unnecessary when doing "pushing" exercises. Using gloves may interfere with your grip, so use is a matter of personal preference.
Video: Ideally, trainees can work in pairs, and each will each have her own smartphone or iPod with video recording capability. It is extremely helpful for each athlete's partner to video her technique for study and refinement.
When first starting to lift, a suitable routine consists of 5 sets of 5 repetitions of each exercise. Starting out using extremely light weights, a 100 repetition [5x5 x 4 exercises] workout focusing on form should be reasonable in terms of overall workload and can be beneficial even if performed once per week.
As you begin to add weight, and if you have the ability to lift two days per week (such as a Monday/Thursday or Tuesday/Friday schedule to maximize recovery time amidst other activities), the exercises can be divided up into groups. For example, deadlifts and overhead press on one day, squats and bench press on another day. Such a workout can be easily accomplished with a 30-minute session. Twice weekly workouts also allow for additional time for warmup sets as weights get heavier, as well as additional accessory exercises.
Another option is squatting every workout, then adding bench press plus bent over row one day, and overhead press plus deadlift on the other day. This schedule is the basis of the popular Stronglifts program.
At first, once basic technique has been established using minimal weight or an empty bar, you can expect to add a small increment of weight (generally five pounds) every week. This "linear progression" can continue for a period of time, depending on age and maturity, until you are unable to cleanly complete all repetitions.
At that point, it is useful to "deload" by reducing the weight by at least ten percent, and continuing to chip away at making progress. Remember that weight is not the goal, it is simply the outcome of the process.
For the intermediate to advanced lifter, there are a variety of other progressions that can be tracked online or with spreadsheets that vary the amount of work volume and intensity with different combinations of weight, reps, and sets. But a simple 5x5 routine with a linear progression and close attention to form is sufficient to get started over the first 12-18 months.
It's important to note that these lifting techniques and beneficial motor patterns can be successfully taught to athletes as young as 10-12 years. With all beginners, and especially younger trainees, starting with no weight is advised. While a mature 16 year old might be able start practicing a back squat using a 45 pound Olympic barbell, a younger athlete should perfect her form using a simple air squat of her own body weight first. Weighted bars or PVC pipes can substitute for a barbell when first learning other exercises, and only when proper form has been demonstrated should any weight be added.
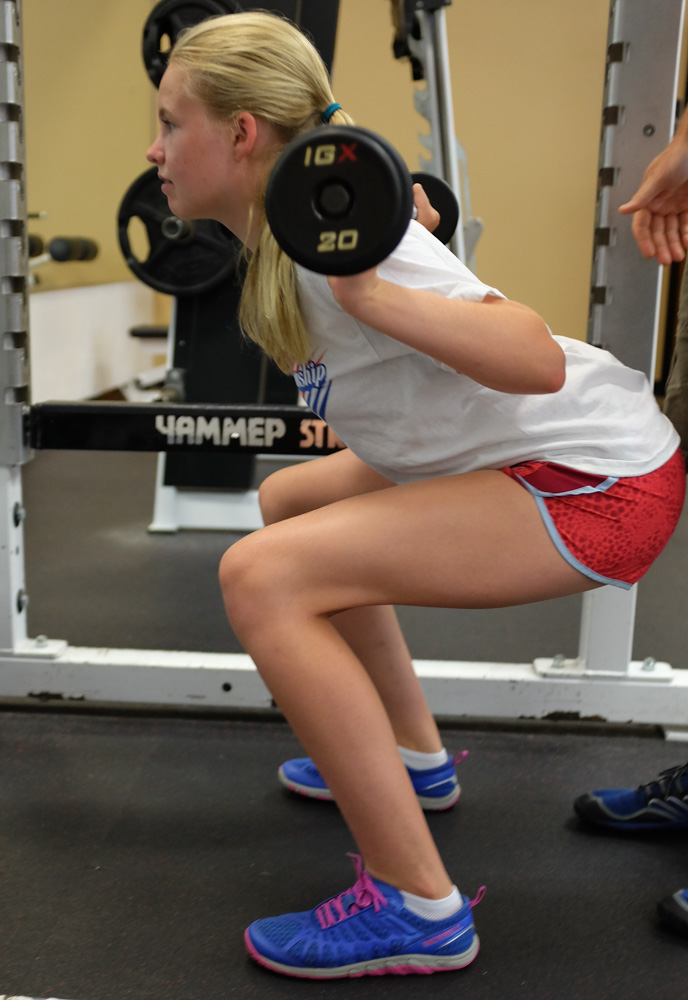
Weight training with a meaningful percentage of an athlete's body weight is generally discouraged for athletes less than 13 years.
Keep in mind that the purpose of adding weight is simply to simulate the stress of competition and fatigue. First, the athlete must demonstrate the proper motor control without weight. Adding weight reinforces the motor patterns and builds endurance so good positioning and movement will be available when needed most in competition.
We initially focus on four basic lifts: back squat, overhead press, bench press, and deadlift. Our technique for each lift will draw heavily from the techniques of Dr. Kelly Starrett's Becoming a Supple Leopard, which is a highly recommended resource for serious students and teachers. While each lift is different, there are five common elements shared by most lifts that we'll discuss first.
Every lift – not just these four – starts with two critical steps: stabilizing your spine and engaging your core muscles. Two useful cues are "Squeeze your glutes" and "Engage your abs." Tightening your gluteus muscles sets your pelvis in a neutral position relative to your spine. Once you have tensed your glutes, the next step is to consciously tighten your abdominal muscles to maintain that pelvis and spinal alignment, at which point the tension in the glutes can be released.
This two-step process is useful outside of weightlifting as well – it is beneficial to frequently check your posture, and using these two cues will help you develop and maintain adequate core muscle tone and good posture at all times.
Finally, your responsibility to stabilize your spine does not end at the beginning of the lift – it is critical that spinal stability be preserved throughout the exercise. Your training partner and instructors should always be looking out for compromised posture to provide quick correction and feedback. Note that you must keep your head and neck similarly aligned in a neutral position throughout the lift – avoid looking around, up, or down.
Common elements three and four are "spreading the floor" and "breaking the bar". An underlying principle of safe and effective movement is how to transfer force from the primary "engines" of your core, hips and shoulders to your extremities. One important yet generally underappreciated ingredient in safe force transfer is generating external rotation torque in your hips and shoulders. External rotation torque is rotational force oriented clockwise on the right, and counterclockwise on the left, or away from the midline of your body.
Specifically, "spreading the floor" means orienting your feet pointed straight ahead, and generating torque in your hips as if you are trying to spread the floor apart and outwards between your feet. Your feet should not actually move, of course, but the torque originating in your hips places your knee and ACL in a stable position under tension, and helps maintain a proper arch to prevent ankles collapsing inward.
Similarly, "breaking the bar" refers to generating external rotation torque in your shoulders as if you are trying to bend or break the barbell when performing lifts like the squat, bench press, overhead press, or deadlift. This shoulder torque stabilizes your elbows in the same way that hip torque stabilizes the knee.
Breathing technique is the fifth common element. Take a deep breath in and hold it at the beginning of your lift, right after you engage your abs. At that point, you should picture your belly as a filled, rigid steel tank. Hold your breath throughout the descent, and exhale while maintaining your abdominal tone as you are pushing/pulling to complete the repetition. When back at the starting position, picture yourself pulling some more air into the rigid steel tank of your abdomen and take another breath before repeating the process.
There is controversy about breath holding during the exertional pushing/pulling phase of the lift, also referred to as a "Valsalva maneuver". While breath holding under exertion has traditionally been discouraged as it results in elevated blood, abdominal, and thoracic pressures, recent study indicates that a brief Valsalva may be an adaptive, protective response to heavy exertion by increasing pressures both inside and outside of blood vessels, so the effective pressure across the vessel wall ("transluminal pressure") is reduced.